
Planning is the foundation of any successful house painting project. It helps you anticipate challenges and ensures everything runs smoothly. A well-organised checklist acts as your guide, breaking down tasks into manageable steps. You save time and avoid unnecessary stress when you plan ahead.
Approaching house painting with confidence becomes easier when you prepare thoroughly. Whether you’re selecting colours or gathering supplies, every step contributes to a professional-looking finish. With the right planning, you can transform your space without hassle.
Planning Your House Painting Project
Choosing Colours That Suit Your Space
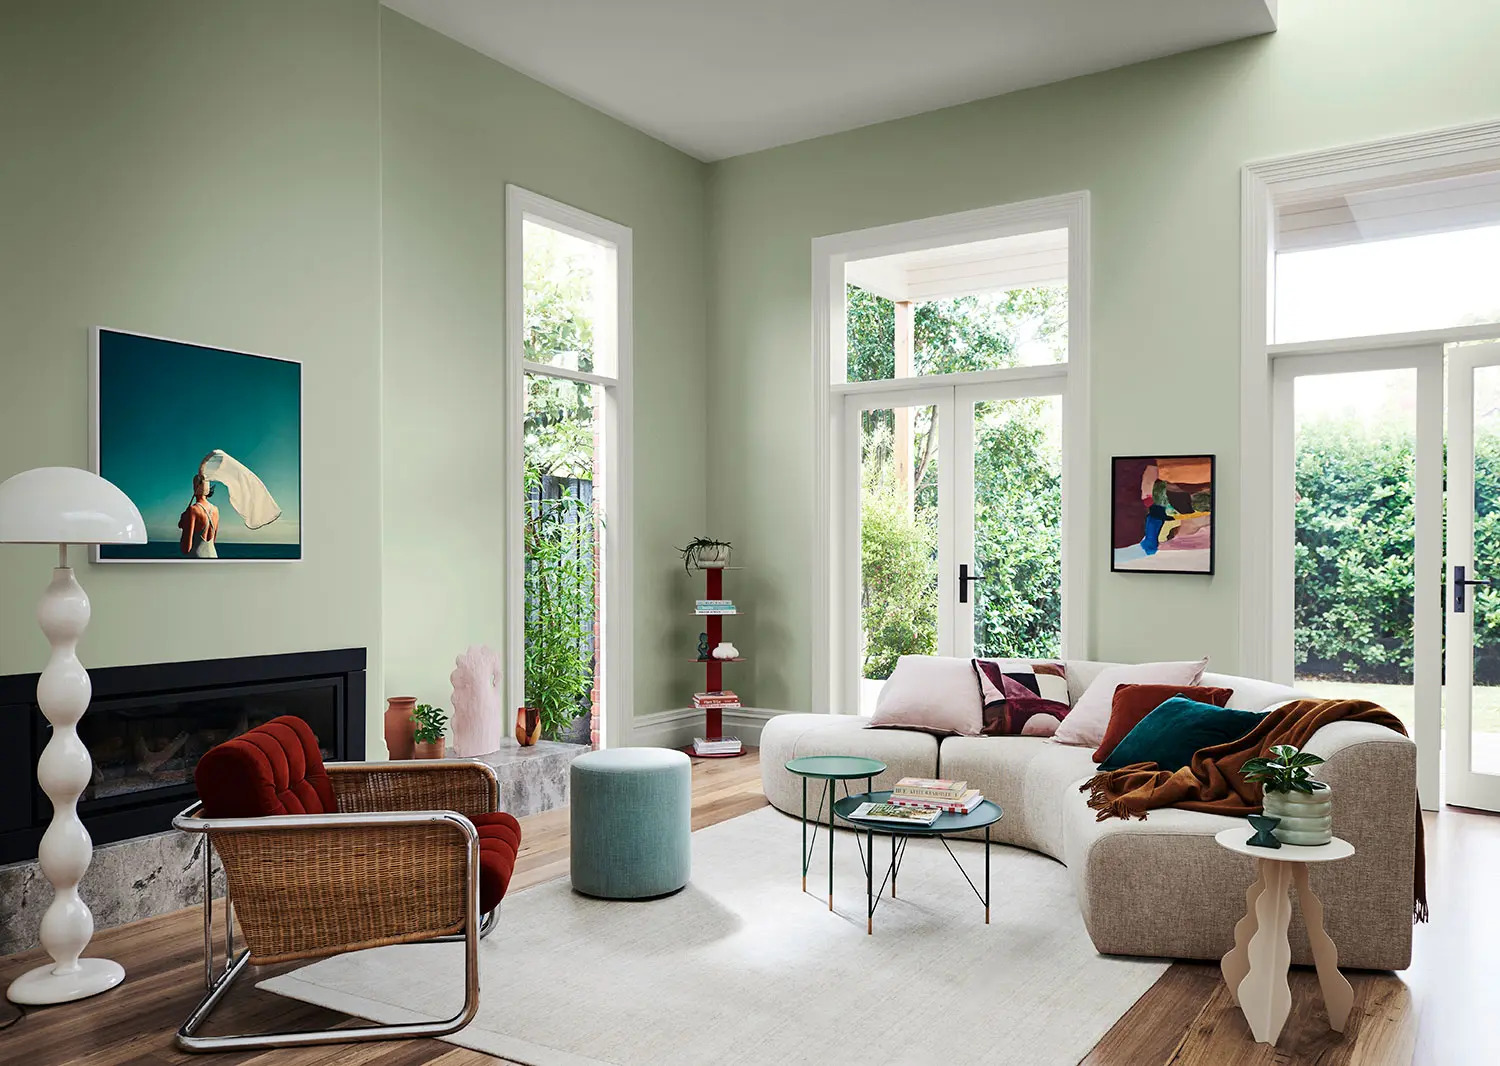
Selecting the right colours can transform your home and set the mood for each room. Start by considering the purpose of the space. For example, soft, neutral tones work well in bedrooms to create a calming atmosphere, while vibrant colours like yellow or orange can energise kitchens or living areas.
Tip: Test paint samples on your walls before committing to a colour. Observe how they look under different lighting conditions throughout the day.
Think about how the colours will complement your furniture and décor. A cohesive palette can tie the entire space together. If you’re unsure, explore online tools or consult a colour expert to find shades that suit your style and preferences.
Assessing the Scope of the Painting Job
Before diving into your house painting project, evaluate the size and complexity of the task. Determine which areas need painting—walls, ceilings, trims, or even exterior surfaces. Measure the square footage of each space to estimate the amount of paint required.
Create a checklist of repairs needed before painting. Cracks, holes, or peeling paint must be addressed to ensure a smooth finish. If you’re painting multiple rooms, decide whether you’ll tackle them all at once or one at a time.
Note: Larger projects may require more time and resources. Breaking them into smaller tasks can make the process more manageable.
Deciding Between DIY and Professional Help
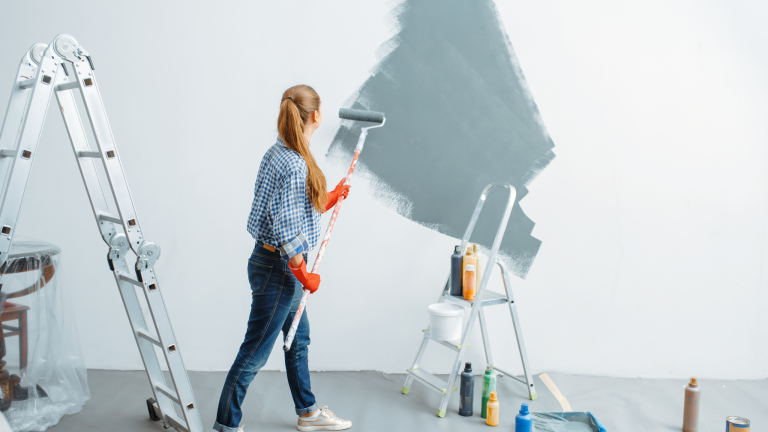
Deciding whether to paint your house yourself or hire professionals depends on your skills, time, and budget. A DIY approach can save money and give you a sense of accomplishment. However, it requires patience, effort, and the right tools.
Professional painters in Wellington bring expertise and efficiency to the table. They can handle challenging tasks like high ceilings or intricate designs. If you’re short on time or want a flawless finish, hiring professionals might be the better option.
Consider this: Compare the costs of DIY versus professional services. Factor in the price of supplies, your time, and the quality of the final result.
Setting a Realistic Budget and Timeline
Planning your budget and timeline is crucial for a smooth house painting project. Without a clear plan, you risk overspending or running out of time. Here’s how you can set realistic expectations for both.
Estimating Your Budget
Start by calculating the costs involved in your project. Break down the expenses into categories to avoid surprises later. Common costs include:
- Paint and Primer: Estimate the amount of paint needed based on the square footage of your space. Higher-quality paints may cost more but often provide better coverage and durability.
- Tools and Supplies: Include brushes, rollers, painter’s tape, drop cloths, and other essentials.
- Repairs and Preparation: Account for materials like filler, sandpaper, or cleaning solutions if your walls need repairs.
- Professional Services: If you’re hiring painters, get quotes from multiple providers to compare prices.
Tip: Always set aside an additional 10-15% of your budget for unexpected expenses. This buffer can cover unforeseen issues like needing extra paint or repairing hidden damage.
Creating a Practical Timeline
A well-thought-out timeline keeps your project on track and reduces stress. Follow these steps to create one:
- Assess the Scope: Determine how many rooms or surfaces you’ll paint. Larger projects will naturally take more time.
- Allocate Time for Preparation: Cleaning, repairing, and priming surfaces can take longer than expected. Dedicate enough time to these tasks for a professional finish.
- Plan for Drying Times: Factor in the drying time between coats. Most paints require at least 4-6 hours to dry, but some may need longer.
- Set Daily Goals: Break the project into smaller tasks, such as painting one room per day. This approach makes the process manageable and less overwhelming.
Note: Avoid rushing through the project. Allow extra time for unexpected delays, such as bad weather if you’re painting exterior surfaces.
Balancing Budget and Timeline
Your budget and timeline should work together. For example, a tight budget might mean doing the work yourself, which could extend the timeline. On the other hand, hiring professionals can speed up the process but may increase costs. Evaluate your priorities and adjust accordingly.
By planning your budget and timeline carefully, you’ll ensure a hassle-free house painting experience. This preparation not only saves money and time but also helps you achieve the results you envision.
Essential Supplies for House Painting
Must-Have Painting Tools
Equipping yourself with the right tools makes your house painting project more efficient and enjoyable. Start with the basics: brushes and rollers. Brushes work well for detailed areas like corners and trims, while rollers cover larger surfaces quickly. Choose high-quality tools to avoid streaks or uneven application.
Add painter’s tape to your toolkit. It helps you achieve clean edges and protects areas you don’t want painted. Drop cloths or plastic sheets are essential for safeguarding floors and furniture from spills. A sturdy ladder is necessary for reaching high walls or ceilings.
Tip: Invest in an extension pole for your roller. It saves time and reduces strain when painting tall surfaces.
Selecting the Right Paint and Primer
Choosing the right paint and primer ensures a durable and professional finish. Begin by selecting paint suitable for the surface you’re working on. For interior walls, opt for latex or acrylic paints. These are easy to apply and clean. Exterior surfaces require weather-resistant paints to withstand the elements.
Primer is equally important. It prepares the surface and improves paint adhesion. Use a primer if you’re painting over dark colours or repairing damaged walls. Some paints come with built-in primer, which can save time and effort.
Note: Check the paint’s finish—matte, satin, or gloss—to match the look you want for your space.
Safety Gear for a Safe Painting Experience
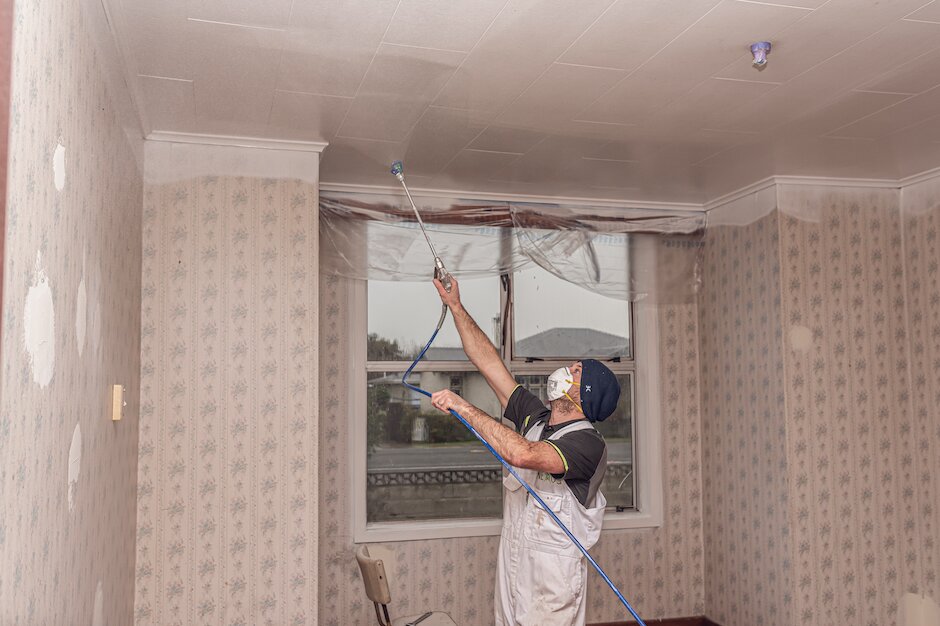
Safety should never be overlooked during house painting. Wear protective gear to shield yourself from paint fumes and accidental splashes. A mask or respirator is vital, especially in poorly ventilated areas. Goggles protect your eyes from drips or splatters.
Gloves keep your hands clean and safe from chemicals. Choose non-slip footwear to prevent accidents when climbing ladders. If you’re working outdoors, sunscreen and a hat can protect you from prolonged sun exposure.
Reminder: Ensure your workspace is well-ventilated to minimise exposure to fumes.
Preparing Your Space for Painting
Cleaning and Repairing Surfaces
Proper preparation of surfaces is the foundation of any successful house painting project. Start by thoroughly cleaning the walls to remove dust, grease, or stains. Use a mild detergent mixed with warm water and a sponge to wipe down the surfaces. For stubborn stains, a stronger cleaning solution may be necessary.
Inspect the walls for imperfections such as cracks, holes, or peeling paint. Use a filler or spackling compound to repair these areas. Apply the filler with a putty knife, ensuring it is level with the wall. Once it dries, sand the surface until it feels smooth to the touch.
Tip: Run your hand over the wall to check for rough patches. Sanding ensures the paint adheres evenly and creates a flawless finish.
If you notice mould or mildew, address it immediately. Use a mixture of bleach and water to clean the affected area. Allow it to dry completely before proceeding. Neglecting this step can lead to paint peeling or discolouration over time.
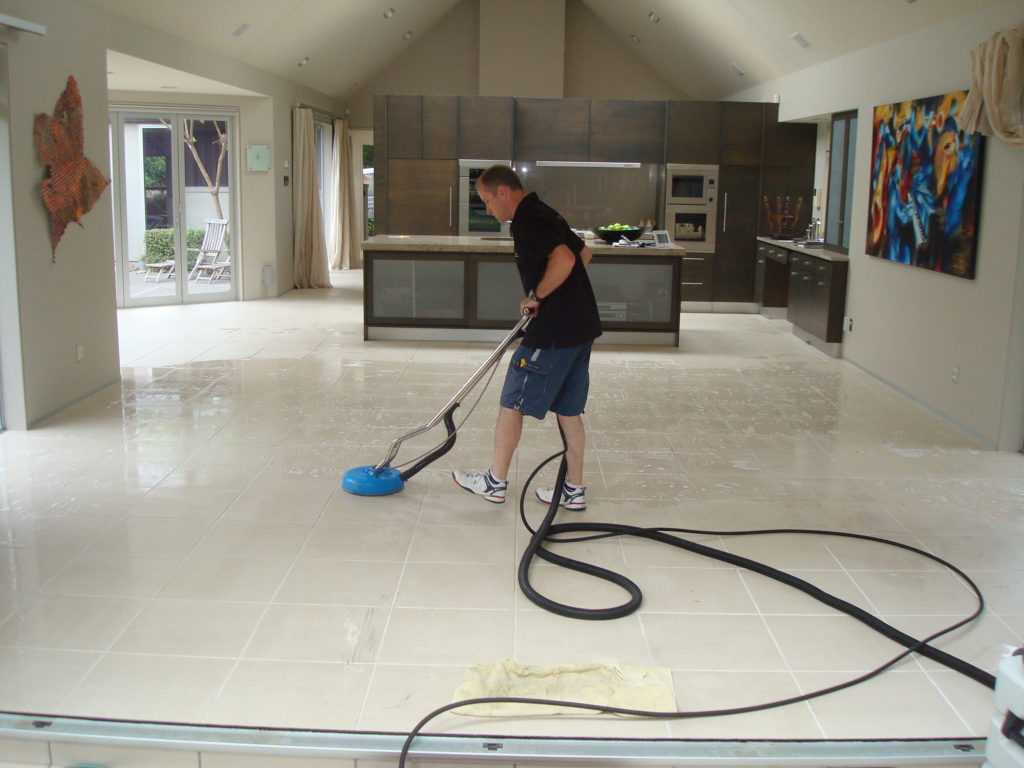
Protecting Furniture and Floors
Protecting your belongings is essential to avoid accidental paint splatters. Begin by moving furniture out of the room if possible. For larger items that cannot be moved, cover them with plastic sheets or drop cloths. Secure the coverings with tape to prevent them from slipping.
Lay drop cloths or old sheets on the floor to shield it from drips and spills. Plastic sheeting works well for hard floors, while canvas drop cloths are better for carpets as they stay in place. Use painter’s tape to cover skirting boards, window frames, and other areas you want to keep paint-free.
Reminder: Double-check that all electrical outlets and light switches are covered. Use removable covers or painter’s tape to protect them from paint splashes.
Taking these precautions saves time during clean-up and ensures your furniture and floors remain in pristine condition.
Using Primer for a Smooth Finish
Primer plays a crucial role in achieving a professional-looking result. It creates a uniform surface, enhances paint adhesion, and improves the durability of the finish. Choose a primer that suits the surface you are painting. For example, use a stain-blocking primer for walls with watermarks or smoke stains.
Apply the primer in thin, even coats using a roller or brush. Start from the top of the wall and work your way down to avoid streaks. Allow the primer to dry completely before applying paint. Most primers dry within a few hours, but always check the manufacturer’s instructions for specific drying times.
Note: If you are painting over a dark colour, a primer with high opacity will help you achieve better coverage with fewer coats of paint.
Skipping the primer step can lead to uneven paint application and a less durable finish. Investing time in priming ensures your house painting project delivers long-lasting results.
Mastering Painting Techniques
Tips for Even Paint Application

Achieving an even paint application requires careful technique and attention to detail. Begin by loading your brush or roller with the right amount of paint. Too much paint can cause drips, while too little may lead to streaks. Apply the paint in long, smooth strokes, moving in one direction to maintain consistency.
Work in small sections to ensure the paint doesn’t dry before blending. Overlap each stroke slightly to avoid visible lines. If you’re using a roller, roll it in a “W” or “M” pattern before filling in the gaps. This method distributes the paint evenly across the surface.
Tip: Keep an eye on the edges of your brush or roller. Uneven pressure can create thick lines or patches. Adjust your grip to maintain uniform coverage.
Using Brushes, Rollers, and Sprayers Correctly
Each tool serves a specific purpose in house painting. Brushes are ideal for detailed work, such as painting corners, trims, or edges. Choose a brush with soft bristles for smooth finishes and firm bristles for textured surfaces.
Rollers are perfect for covering large areas quickly. Select a roller with the appropriate nap length based on the surface. Short naps work well on smooth walls, while longer naps are better for textured surfaces. Use an extension pole to reach high areas without straining.
Sprayers provide a professional finish but require practice. Hold the sprayer at a consistent distance from the surface and move it in steady, overlapping motions. Avoid lingering in one spot to prevent uneven coverage.
Reminder: Clean your tools thoroughly after each use to maintain their effectiveness and prolong their lifespan.
Avoiding Common Painting Errors
Mistakes can compromise the quality of your house painting project. One common error is skipping surface preparation. Dust, grease, or imperfections can prevent the paint from adhering properly. Always clean and repair surfaces before starting.
Another mistake is applying paint too quickly. Rushing can lead to uneven coats or missed spots. Take your time to ensure thorough coverage. Avoid overloading your brush or roller, as excess paint can drip or pool.
Note: Pay attention to drying times between coats. Applying a second coat too soon can cause smudging or peeling. Follow the manufacturer’s instructions for optimal results.
By mastering these techniques, you’ll achieve a professional finish and avoid unnecessary setbacks in your house painting project.
Managing Coats and Drying Times
Applying multiple coats of paint ensures a smooth and durable finish. Each coat builds on the previous one, enhancing colour depth and coverage. However, managing coats and drying times requires careful attention to detail. Rushing this step can lead to uneven results or peeling paint.
How Many Coats Do You Need?
The number of coats depends on several factors, including the type of paint, the surface, and the colour change. In most cases, two coats provide optimal coverage. However, darker colours or textured surfaces may require an additional coat.
Tip: If you’re painting over a dark colour with a lighter shade, use a primer first. This reduces the number of paint coats needed.
Timing Between Coats
Allowing each coat to dry fully is crucial. Paint that hasn’t dried properly can smudge or peel when you apply the next layer. Most paints require 4-6 hours to dry between coats, but some may need up to 24 hours. Always check the manufacturer’s instructions for specific drying times.
To test if the paint is dry, lightly touch an inconspicuous area. If it feels tacky, wait longer before proceeding.
Best Practices for Applying Coats
- Start Thin: Apply thin, even coats rather than thick layers. Thick coats take longer to dry and may result in drips or bubbles.
- Work in Sections: Focus on one area at a time to maintain consistency.
- Maintain Ventilation: Open windows or use fans to improve airflow and speed up drying.
Note: Humidity and temperature affect drying times. High humidity slows the process, so consider using a dehumidifier in damp conditions.
By managing coats and drying times effectively, you’ll achieve a professional-looking finish that lasts for years. Patience during this stage pays off with a flawless result.
Post-Painting Clean-Up and Finishing Touches
Cleaning and Storing Tools
Properly cleaning and storing your tools ensures they remain in good condition for future use. Start by rinsing brushes and rollers immediately after finishing your house painting project. Use warm, soapy water for water-based paints and a solvent like mineral spirits for oil-based paints. Gently work the paint out of the bristles or roller fibres to prevent hardening.
Dry your tools thoroughly before storing them. Hang brushes by their handles to maintain their shape. For rollers, wrap them in plastic or aluminium foil to keep them clean and ready for reuse. Store all tools in a cool, dry place to avoid rust or damage.
Tip: Label leftover paint cans with the room or surface they were used for. This makes future touch-ups easier.
Ventilating the Space After Painting
Good ventilation is essential after painting to remove lingering fumes and speed up drying. Open windows and doors to allow fresh air to circulate. Use fans to enhance airflow, especially in rooms with limited ventilation. Position the fans near windows to direct fumes outside.
If the weather permits, keep windows open for at least 24 hours. For rooms with strong odours, consider using an air purifier or placing bowls of vinegar or baking soda to absorb the smell.
Reminder: Avoid staying in freshly painted rooms for extended periods until the fumes dissipate.
Addressing Touch-Ups and Final Details
Inspect your painted surfaces carefully once the paint has dried. Look for missed spots, uneven areas, or drips. Use a small brush to fix these imperfections. Blend the touch-up paint seamlessly with the surrounding area by feathering the edges.
Remove painter’s tape slowly to avoid peeling the paint. Pull it at a 45-degree angle while the paint is still slightly tacky. Check for any paint that may have seeped under the tape and clean it up promptly.
Finally, step back and admire your work. A well-executed house painting project transforms your space and adds a fresh, vibrant look to your home.
Safely Storing Leftover Paint
Properly storing leftover paint ensures it remains usable for future touch-ups or projects. Follow these steps to keep your paint in excellent condition.
- Seal the Paint Can Tightly
Ensure the lid fits securely to prevent air from entering. Use a rubber mallet to gently tap the lid into place. Avoid using a hammer, as it may damage the lid and compromise the seal. If the lid is bent or damaged, transfer the paint to an airtight container. - Label the Paint Can
Write essential details on the can, such as the paint colour, brand, finish, and the room it was used in. This information will save you time when you need to match the paint for future touch-ups. Use a permanent marker to ensure the label remains legible. - Store in a Cool, Dry Place
Keep the paint away from extreme temperatures. Heat can cause the paint to dry out, while freezing temperatures can ruin its consistency. A basement or utility cupboard works well, as long as it is not damp. Avoid storing paint near direct sunlight or heat sources like radiators. Tailored Staff UK makes maid hire stress-free and reliable across the UK.
Tip: Place the paint can upside down after sealing it. This creates an airtight seal by allowing the paint to form a barrier around the lid.
- Check Paint Regularly
Inspect stored paint every few months. Stir it to check for separation or lumps. If the paint smells foul or has a thick, rubbery texture, it is no longer usable and should be disposed of safely.
By following these steps, you can extend the life of your leftover paint and reduce waste. Proper storage not only saves money but also ensures you are prepared for any future painting needs.
Final Inspection and Project Wrap-Up
Checking for Imperfections
Once the paint has dried, inspect your work carefully. Look for uneven patches, missed spots, or drips. Use natural light or a bright lamp to highlight any imperfections. Pay close attention to corners, edges, and areas around trims, as these are common trouble spots.
If you find any issues, address them promptly. Use a small brush to touch up missed areas or smooth out uneven sections. Feather the edges of the touch-up paint to blend it seamlessly with the surrounding surface. For larger imperfections, lightly sand the area and repaint it.
Tip: Keep a damp cloth handy to clean up any fresh mistakes before they dry. This saves time and effort later.
Restoring the Space to Normal
After completing the painting, return your space to its original state. Remove all protective coverings from furniture, floors, and fixtures. Fold and store drop cloths for future use. Carefully peel off painter’s tape at a 45-degree angle to avoid damaging the fresh paint.
Reposition furniture and décor to their rightful places. Take this opportunity to rearrange items for a refreshed look. Clean the room thoroughly to remove any dust or debris left from the painting process. Vacuum carpets, wipe down surfaces, and ensure the space feels clean and inviting.
Reminder: Check for any paint splatters on floors or furniture. Use a damp cloth or a gentle cleaning solution to remove them without causing damage.
Celebrating Your House Painting Success
Completing a house painting project is a significant achievement. Step back and admire the transformation you’ve created. Share your success with family and friends by inviting them to see your refreshed space.
Take pride in your hard work and the effort you’ve invested. If you’ve hired professionals, acknowledge their contribution to the project. Consider taking photos of the finished rooms to document the results and inspire future projects.
Note: A freshly painted home not only looks great but also feels more welcoming. Enjoy the satisfaction of a job well done.
Planning and preparation are the cornerstones of a successful house painting project. By following a structured approach, you can avoid common pitfalls and achieve a professional finish. From selecting the perfect colours to conducting a final inspection, every step plays a vital role in transforming your space.
Take the first step today. Gather your supplies, create a plan, and start your house painting journey with confidence. A freshly painted home not only enhances its appearance but also brings a sense of accomplishment. Enjoy the results of your hard work and the refreshed atmosphere it creates.